To create a custom layout choose the option which says ‘Create/Edit a Custom layout’ for either the public or member homepage. This will take you through to the homepage builder.
The homepage builder allows you to create any layout you would like by adding widgets to the page and dragging and dropping them into position. Widgets can be set to either one column, two columns or three columns wide. Heights can be set to automatically fit the content or to a set height in which case scroll bars will be displayed if necessary.
The widgets that are available for use on the homepage are listed here.
To create your custom homepage:
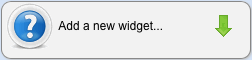
Click on the dropdown menu which says ‘Add a new widget...’ and choose the widget you wish to add to the page.
A button will appear next to the drop down saying ‘Add widget’. Click this button

You will be presented with the options page for the widget you have selected. Most of the widgets share some generic options, such as Widget Name, and then will have options specific to individual widget types. To see the options specific to each widget, click here.
Generic Options
| Widget Name | Allows you to give the widget a unique name. This is required and must not be the same as any other widgets you have already added to the page. |
| Widget Width | This is the number of columns wide that the widget will be. The homepage is split into 3 different columns so you could have a width a 1,2 or 3 column widths. |
| Widget Height | This is the height of the widget on the page. You could have this as a fixed height such as 400 or you can leave it set to auto in which case it will automatically adjust the height according to the widget content. |
| Widget Header Type | There are three header types to choose from: Coloured Header - this is a colour behind the header of the widget Image Header - this allows an image to be uploaded to appear behind the header No Header - if no header is required for the widget. |
| Widget Title | This is the text that will appear at the top of the widget |
| Widget Background Type | This will be the background behind the actual widget |
| Round Corners? | If this is ticked then the corners of the widget will appear rounded as opposed to straight |
| Display Shadows? | If this is ticked then a shadow effect will appear behind the widget |
| Border Colour | This is the colour of the border around the widget |
Fill in all the option boxes as necessary. You will not be able to add the widget to the page until all required options have been filled in.
If there is anything wrong with an option a red box will appear next to it when you click ‘Add Widget’ advising you on what needs to be resolved.

Once everything is satisfactory the widget will appear on the page. You have added your widget.
To continue you may add another widget as above or you may edit or delete existing widgets (see below).
Editing a widget
 To edit a widget click on the small pencil icon in the header bar. This will open a similar window as before which will allow you to edit the options for the widget. For most widgets you will simply be shown the same options allowing you to make changes and then update. Some widgets like the image rotator are slightly more complicated but these will be explained in the section for those widgets.
Deleting a widget
 To delete a widget simply click on the red X icon. You will be asked to confirm deletion of the widget and when you click on the ‘Delete Widget’ button it will be removed.
WARNING
Once a widget has been removed it cannot be recovered and will need to be recreated from scratch.
Moving a widget
To move a widget simply click the header area, keep the button held down and drag the widget to its new position. While dragging, the widget will take on a ghosted appearance so you can see where you are dragging it to and a yellow drop target will appear if the new location is available for dropping. Some widgets may need to refresh the page when dropped due to their content but you will be warned if this is the case. Widget positions are automatically saved on dropping.