This tutorial shows how to add an image to your web page.
-
Open your web page in the Web Editor
-
Click on the Image Icon in the Web Editor Tool Bar

-
In the popup window click on the Browse Server button
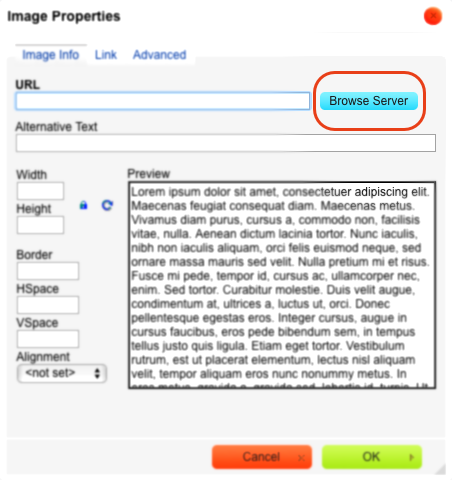
-
In the second popup window you can either select an image that has already been uploaded by clicking it
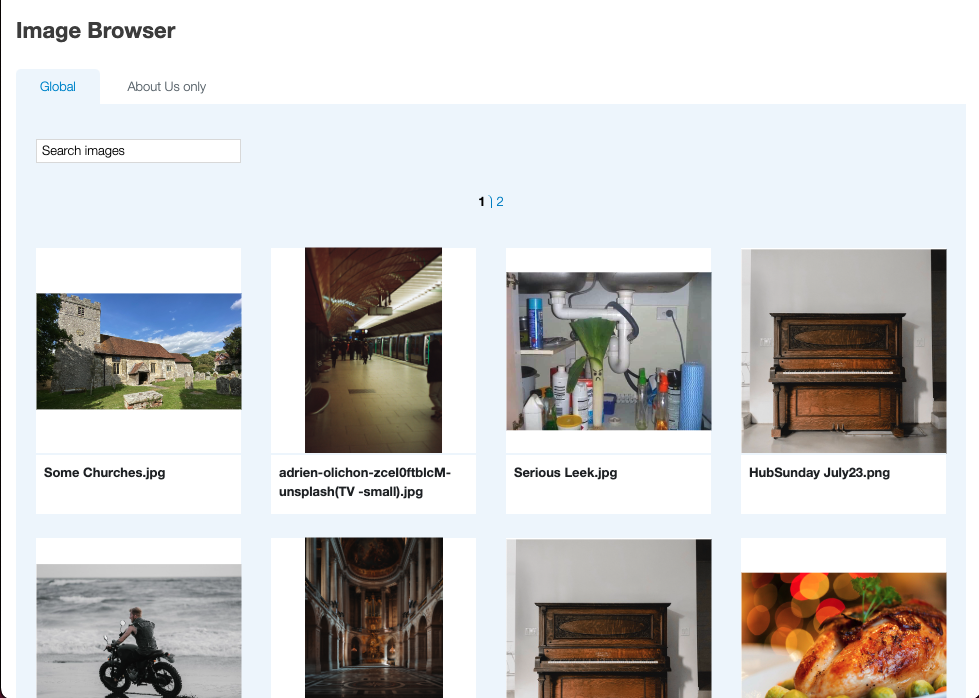
or you can select one from your computer by clicking on the Choose Image button at the bottom of the page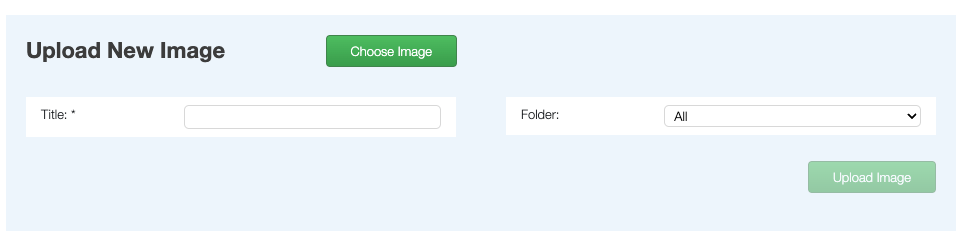
-
Click Upload Image to add the image to your website
-
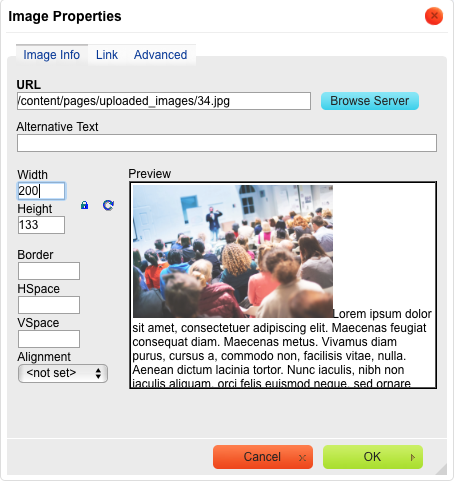
Once the image has been uploaded (this can take a long time if the image is large) you will see it appear in the page above. Click on the image to return to the previous window.
-
You will then be able to change the image width, height, etc. If you want your image to appear to the left or right of the page then click on the Alignment option at the bottom of the popup and change it to Left or Right.
-
When you are happy with the size of the image press OK to insert it into your web page
Note
If your site is being used on mobile devices, we recommend that you set the width of the image as a percentage. If you want the image to be the full width of the page, set the width to '100%', or if you want it to be half the width of the page set it to '50%'. If you set the width as a percentage, you need to leave the height blank