To create a rota click on the relevant group from the left hand side of the Rota section of Global Office and then click the New Rota button.

You will then be able to enter the necessary details for the rota.
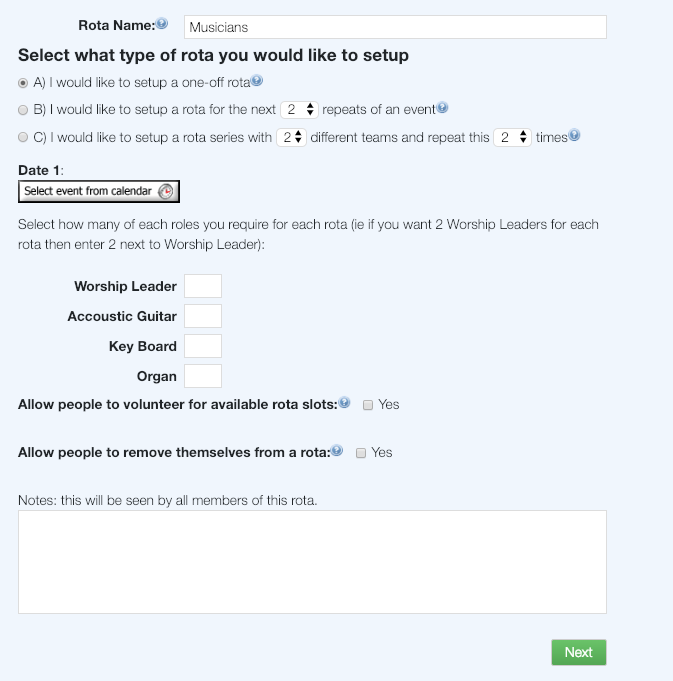
The name of the rota should be something that makes the rota easily recognisable. For example, if the rota is for your regular Sunday worship team, you could call it 'Sunday Morning Band'.

You have 3 options for the type of Rota
- A) is for rotas that are a single, one off event
- B) is for rotas for the next X repeats. If you wanted to setup rotas for the next X number of weeks then this is the option you need. You may want to do 7 weeks of rotas and select who fulfils which role for each of the weeks.
- C) is for churches who have different teams for different weeks. For example if you have 4 different teams of musicians and they are are on the rota every 4 weeks then you should create a rota series with 4 different teams. You can then select to repeat this a number of times - so if you had a series of 4 teams and repeated the series 5 times, it would mean that 20 weeks of rotas are easily created.

Each rota needs to be attached to an event, or series of events. Click the Select event from calendar button to choose which event your rota is for. If you are creating a series, select the first event in the series and the events/dates for the rest of the series will automatically be created.

If you want people to be able to volunteer for available rota slots, or remove themselves from duties they have been scheduled for, you will need to check one, or both of these check boxes.

Note
People will only be able to volunteer for roles that they are allowed to do, for example, someone can only volunteer for a Backing Singer role if they have been setup to do this.
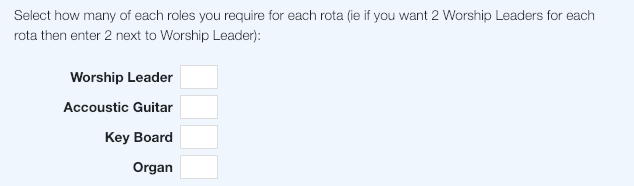
You will need to specify how many people you can have for each role. For example, if your music team has room for 2 backing singers, you will need to enter 2 in the box next to Backing Singer. This doesn't mean you will have to use 2 backing singers but it will allow you to if you have 2 singers available.
You can add any notes you need to, for the team. This will be displayed on the rota and the email notifications so is visible to everyone on the rota.
Once all the details are entered click the Next button and you will be asked to confirm the dates and roles for the rota. If you see any errors, click the Cancel button and you will be able to amend the rota.

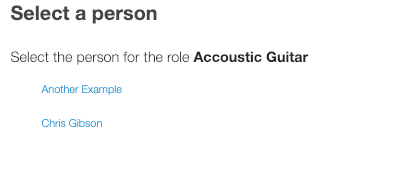
When you've confirmed the rota details, you need to add people to fulfil the roles. This is done by clicking Select Person beneath the relevant role and selecting who is going to fulfil the role. You can change the person selected by clicking the pencil icon next to their name.

The select person dialogue will only show people that can fulfil the role you are selecting for and will show a warning next to anyone who is already fulfilling a role for that day. People are able to fulfil more than one role if you choose. If you have no one to fulfil a particular role, it can be left blank.
Once you have selected the people for the rota click the Confirm button to save. Members will be able to view the rotas they are on from their area in the website. They will also receive an email with details of the rota. If you don't want the rota to be published immediately, uncheck the Publish Rota button. You will be able to publish the rota later from the Rotas Main page.