Quick Links:
Adding Members | Activating Members | Member Privileges | Deleting Members | Member Profiles | Member Options | Application Options
Adding Members
Members are added either through Global Office or, by people registering on the register page of the site.
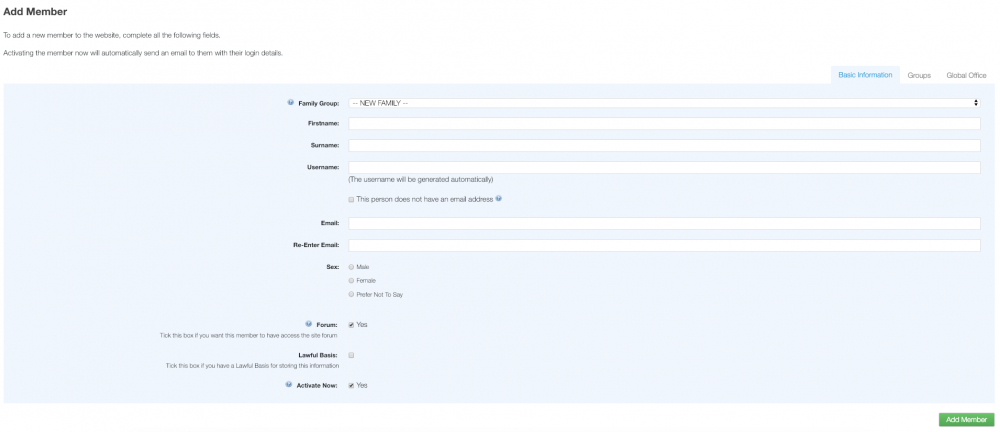
To add members to the site login to Global Office and go to People and then Add Person. You will then be shown the add-member form where you can enter the details of the new member.
The username will automatically be generated in the format of “Firstname Surname” and this will be used by the member to sign-in to the website.
If you want to give the member access to groups or to allow them to update the site in Global office, click the relevant tab.
Activating Members
You are able to add members to your site before it is put live, in this case it is best not to activate them. This means that their details will be stored on the site but the member will not be sent a username and password. This allows site managers to add all the members to the site before it is launched. A button will appear on the member’s page to activate any un-activated members once the site goes live.

Clicking the button will take you the Activation page that will tell you how many members are to be activated and will give you an estimate of how long the activation process will take.

Once the site is live Site Managers should activate members as soon as they are added to the site. This is done by placing a tick in the Activate Now box on the Add Person page. As soon as the member is added they will be emailed their own, unique username and password to access the site.
Member Privileges
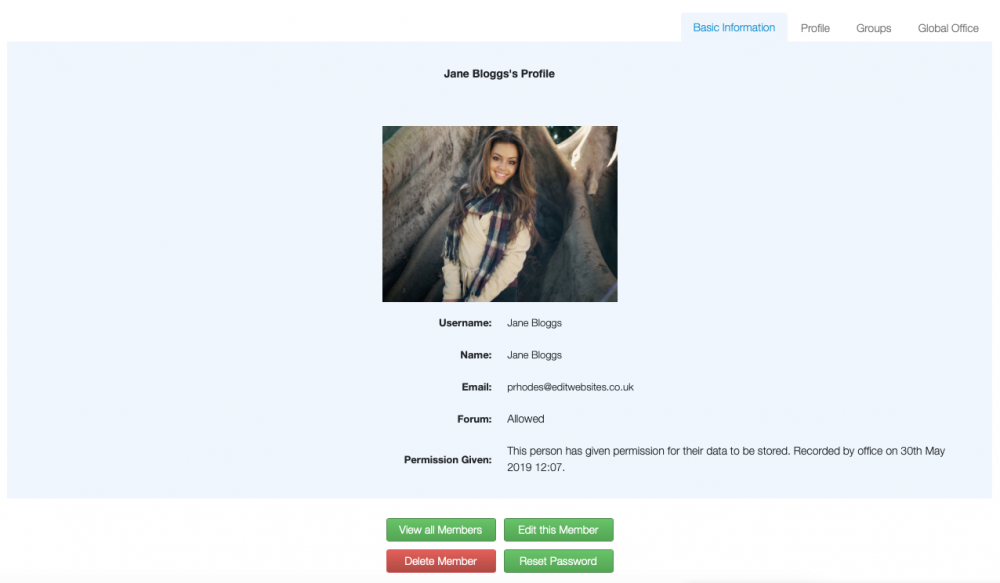
The site manager can access each member’s details, by clicking View All and clicking the member's name, and alter their privileges and group membership.
From this profile page the site manager can:
- Delete the member from the website
- Reset the members password
- Edit the members access
- Edit the members group membership
The Basic Information tab shows the members profile picture (if they've added one), name, username, email address and whether they have access to forums. If the members forum access is taken away then it will prevent that member from accessing any of the forums.
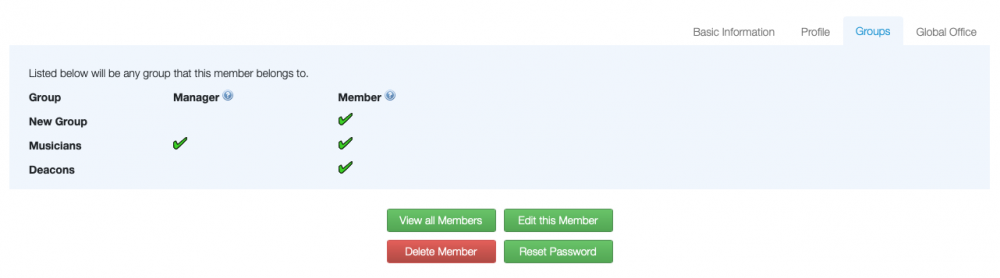
The Groups tab shows any groups the member is a member of, or a manager of.
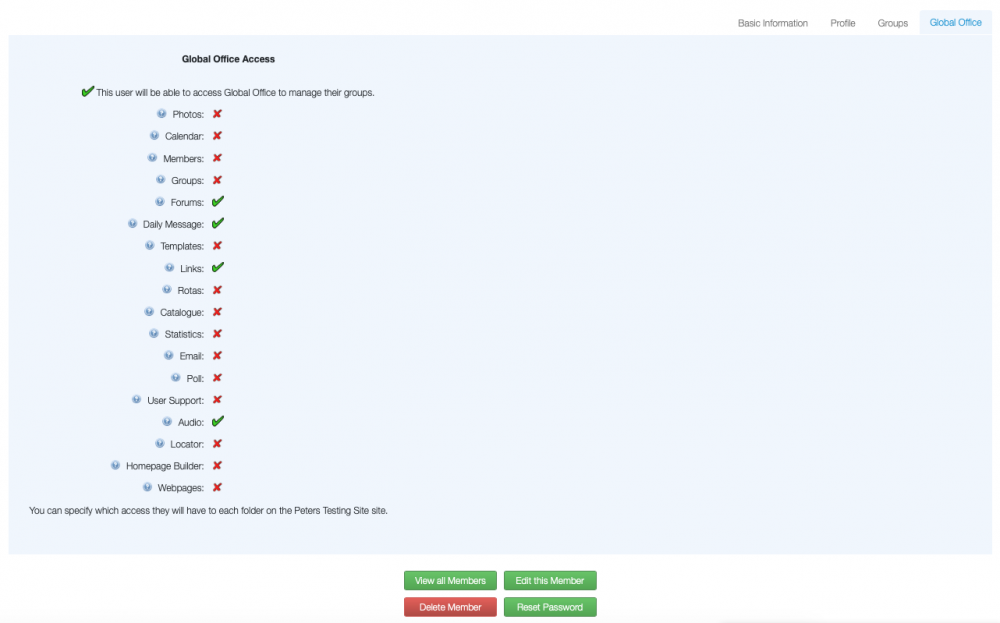
The Global Office tab shows which areas of the website the member has access to for editing.
To edit any of the member privileges you will need to click the Edit this Member button and select the tab that you wish to edit the details of.
Deleting Members
To delete a member, the Site Manager should access the members profile by going to View All and clicking on the person’s name. At the bottom of the profile is the Delete Member button. After this is pressed the site manager will be asked to confirm that the person should be deleted.
NOTE
Once a member is deleted, their information will be destroyed and cannot be restored. All items linked to this member will be deleted : message inbox, username, forum posts.
Member Profiles
Every member has their own profile which other registered members can see. Profiles are an ideal way to let other members know your interests and to find out about other members in the Church. You can also include private information that will only be visible to the member themselves or information that can only be seen by the Global Office Administrator. The Profile Options can be set so that members can update their own profiles or so that the profiles can only be changed by administrators.
To edit the profile options click on the People Options button, on the People page, and then the Edit Profile Options button.
Up to 25 fields can be used in a profile and are a way for members to share more information about themselves or for administrators to store information about a member. It is up to the Church what the fields should contain, the number used and the visibility of them. Examples of what the fields could be are:
- Favourite Bible Verse/Person
- Web Address
- Occupation
- Favourite Quote
- Likes
- Dislikes
- Interests
- Favourite Sport
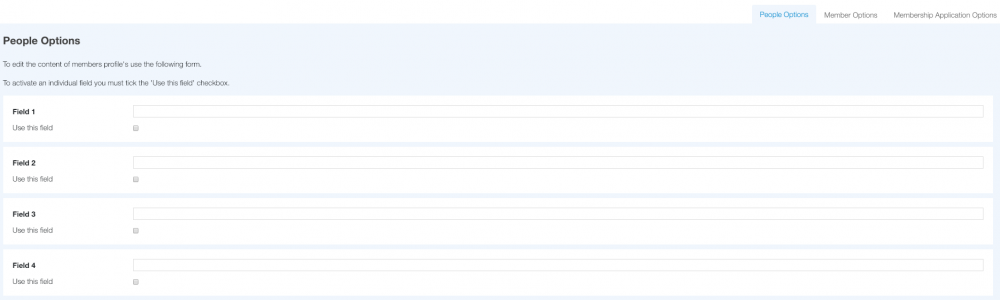
To add fields you will need to enter a name for the field and then check the Use this field? check box for that field. You will then be given further options for setting the visibility and access for that field.
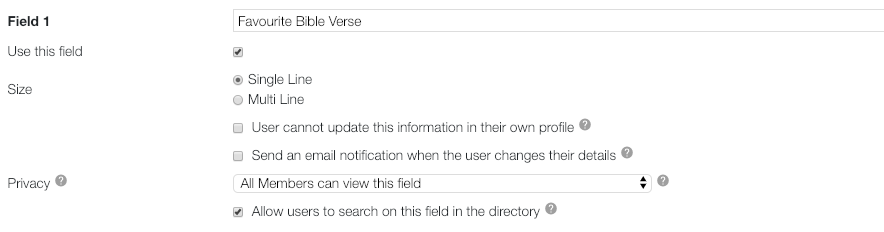
- Single Line | Multi Line determines the size of the box that will be available for the person's details to be entered in.
- User cannot update this information in their own profile, if ticked, will mean that only a Global Office administrator can change the details for this field.
- Send an email notification when the user changes their details allows you to add an email address for notifications of any changes made. If the box is ticked a text box will be added at the end of the page where the notification email address can be added.
- Privacy allows you to decide who will be able to see the contents of this field. This can be set to All Members, Members can only view their own or Global Office administrators only. In all cases, administrators will be able to view the fields.
- Allow users to search on this field in the directory will make the data in this field available to searches.
Your church can also specify whether to allow Birthdays to be shown in each member’s profile. If this is enabled then the member will still have the option to hide it from view (if they do allow it to be shown then their year of birth will not be shown). There is the option to allow photographs of members to be uploaded and displayed in their profile. If this is enabled then a member can upload one photograph but it will not be displayed until the Site Manager has approved it (When a members image needs to be approved, the Site Manager will see it displayed in their To-Do list on the main Global Office page). Once approved, the members photo will then be displayed in their profile. There is also an option to allow users to add information to About Me which will show on the member's profile.
To delete a field the Site Manager should delete the field name and un-tick the Use box.
Member Options
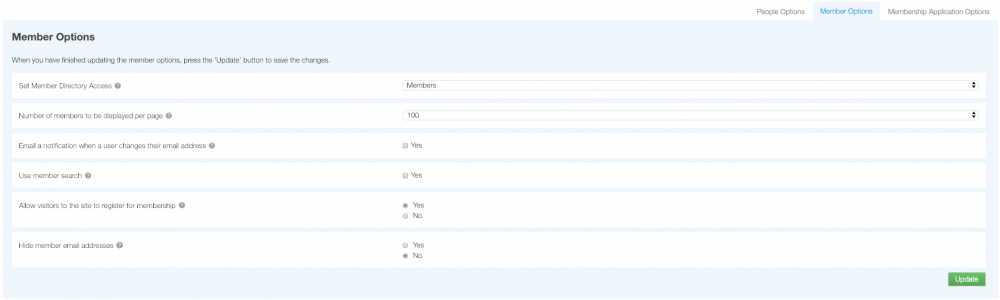
- Set Member Directory Access can be set to Members or Everyone. If set to Everyone you will see a new menu item on your website called Members, people will be able to click this and see a list of the members of your site that have agreed to be shown in the Members Directory. If set to Members the menu item will only be visible to logged in users of your site.
- Number of Members to be displayed per page is useful if you have a lot of members on your site. You can set it to show from 1 member per page to 300 members per page.
- Email a notification when a user changes their email address allows you to be notified of any email changes, this can be useful if you need to keep another directory up to date. If Yes is checked a text box appears where you can enter the email address you would like notifications to be sent to.
- Use Member Search will add a search bar to your Members Directory which will allow you to search by Member's names.
- Allow visitors to register for membership will add a register link to your site, alongside the login link.
 Clicking register will take the visitor to an application for membership of the site which will have to be approved or rejected by a Global Office administrator. The questions on the form can be set up in Application Options.
 - Hide member email address allows members email addresses to be hidden. If set to yes, a form will be displayed which can be completed and will send a message to the member without revealing their email address. If set to no, the email address will be displayed as a clickable link, allowing other members to email them.
Application Options
People can apply to become members of the website by clicking on the Register link that appears if it has been enabled in the Member Options. When someone applies to become a member, their details will be displayed in the Control Panel and the Site Manager will be able to either give that a person their username and adjust their privileges, or reject their application, preventing them from accessing the site.
The Application Form can be customised with up to 10 questions that are asked of the Applicant. The questions could be used to find out more about the person and how long they have been a church member.
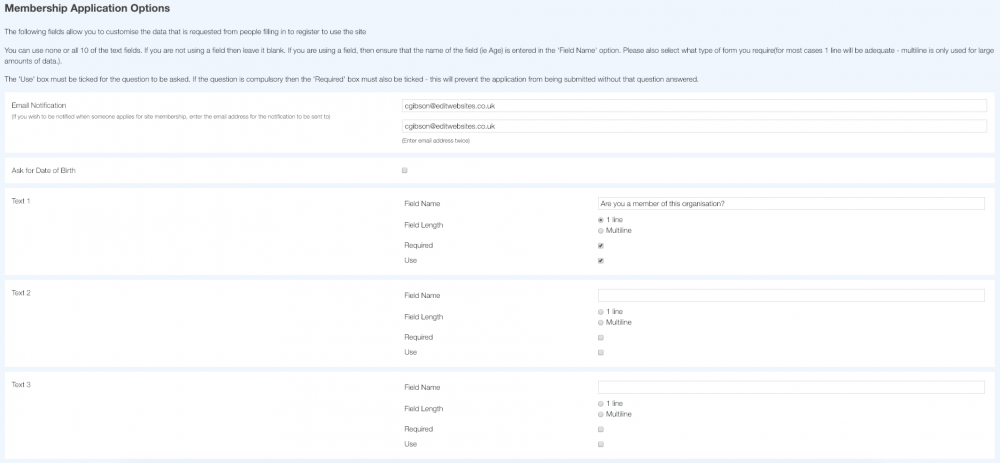
The default questions which are asked are: First name, Surname, Email and Gender, these can't be changed. You can also decide whether you would like applicants to give their date of birth, or not.
If you add optional questions, you can decide if the question is Required or not. If it is Required the applicant will not be able to submit the form without answering the question.
Applicants will also be asked to agree to the terms and conditions of the site before they submit their membership application.
Site Managers can enter an email address so that they are emailed immediately when a new application is waiting approval.