Quick Links:
Adding Audio Files | Audio Homepage Text | Audio Main Page | Podcasting
The Audio feature is an ideal way for distributing the Sunday messages. It allows those who were not able to be at the service to hear what was said and gives you the opportunity to reach a much wider audience.
If you don't see 'Audio' in the menu on your homepage, you will need to switch the feature on. To do this, click Settings in the top menu, click Features and then select Yes next to Audio. You will then need to click Update to make your change live.
Audio Files must be in MP3 or M4a format before they can be uploaded to the site and should be at a suitable bit-rate so that they are not too large. See the audio article on the Church Edit website tips section for information on compressing files.
Adding Audio Files
To add an MP3 Audio to the site, click on Audio from the left navigation menu and click the Add Audio button
This will then display the following form.
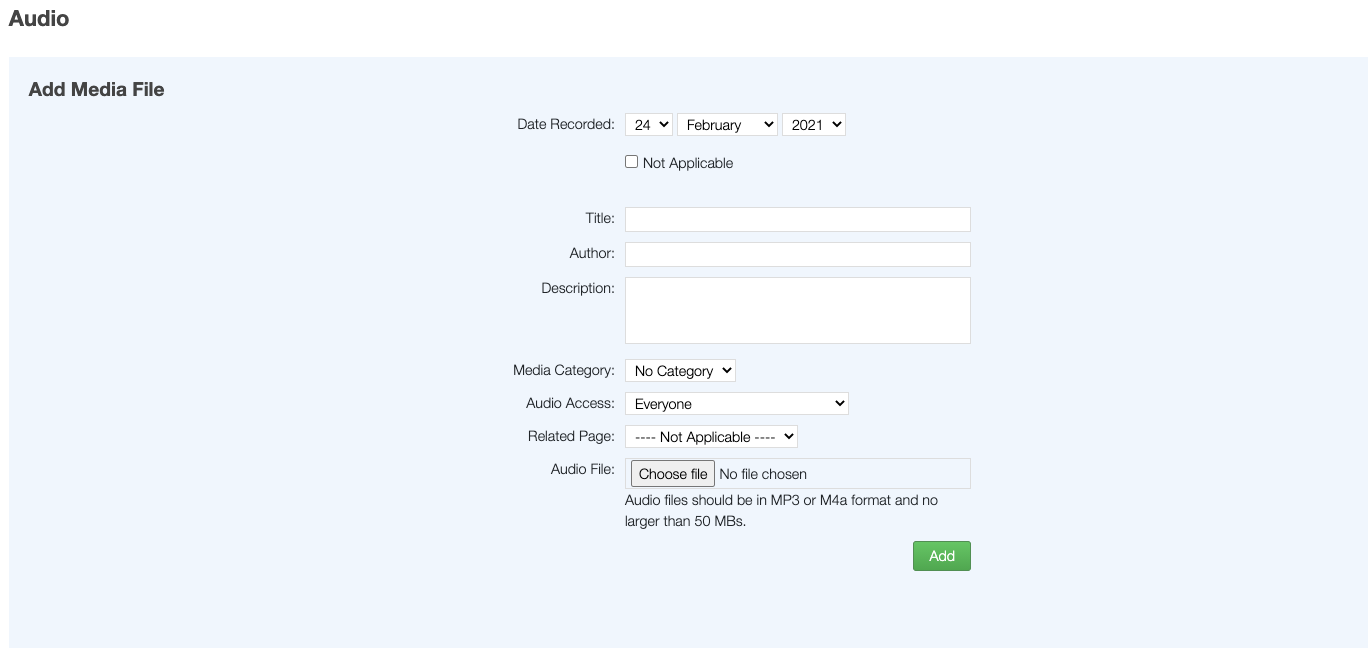
- Date Recorded is the date the recording took place. If this is not known, or you don't want it displayed, tick the Not Applicable box.
- Title is the title you would like displayed on the website, i.e. Sunday Service - April 3rd 2016
- Author is the name of the person who preached the sermon, for example, or if it is a recording of a piece of music, the name of the composer.
- Description is a short summary of what the audio file contains
- Media Category allows you to split your audio files into different categories. If you have a lot of audio files on your site, this is a good way of making them easier to find.
- Audio Access is available to those on the Church Edit Pro package and allows you to specify who has access to the file. This can be restricted to all Members, or to individual groups.
- Related Page lets you link to a page on your site that is relevant to this audio file. Just select it from the drop down box and a link to this page will appear next to the audio file.
- Audio File is selected from your computer by clicking the 'Choose File' button and locating it on your hard drive.
Note
The file MUST be MP3 or M4a format and no larger than 50MBs. If it is any larger then it will not upload.
Once you have completed the form and pressed the Add button, the file will upload. The amount of time it takes to upload is dependant on the size of the file and the speed of your internet connection.
Once the file has been uploaded, the following page is displayed.

To successfully complete the process you must press Continue. This will then add the file to the Audio webpage and generate the XML file.
If you have any documents that are associated with the Audio file (such as Word/Excel/PDF) then you can upload them here by pressing the Choose File buttons. Up to 2 files can be associated with each Audio file.
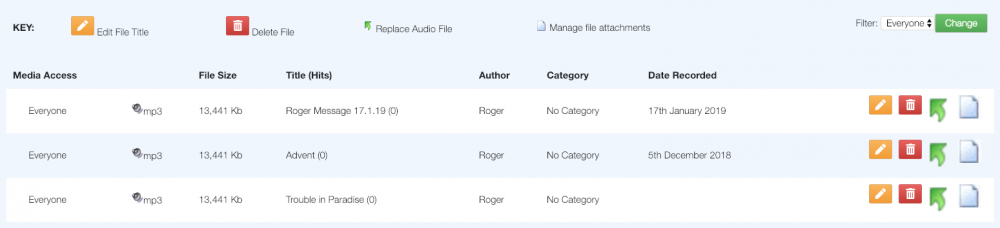
Once you have pressed Continue you will be returned to the main Audio page where you will see a listing of all your Audio files.
Audio Homepage Text
The website will list all the Audio files that have been uploaded to the website. If more than 15 files exist, then the audio files will be spread over 2 or more pages, with the newest shown first.
You can customize the top of the Audio page by clicking Audio in the top menu in Global Office and the clicking the Media Homepage button. This will display the Web Editor which will allow you to add your own text and images to the top of the web page.
Audio Main Page
The following page is the main page for the Audio section within the Global Office. A listing of all audio files is displayed with the most recent shown first. From this page you are able to add new files and replace or delete existing files.